Windows, there is a vbs script which helps you change the default value of icon spacing in. The following tutorial will help you to learn how to change the desktop icon spacing, both vertical and horizontal in Windows. Icon horizontal spacing is for how wide (left-right) the desktop icon will be.
![]()
The wider it is, the more text that will display for the icon’s name without it having to be highlighted. Icon vertical spacing is for how much vertical (up/down) empty space there is inbetween the icons on your desktop to separate them with.
Steps to Change Desktop Icon Spacing (Horizontal and Vertical) in Windows
1. Please download “icon-spacing.rar” (at the end of the page)
2. After unzipping , Right click the Vbs file , then choose Properties from the list.
3. At the bottom of the Properties windows, make sure the box for Unblock is ticked. Then click Apply and OK
4- Clik the icon-spacing.vbe
5- Vertical Icon Spacing : Now set any value between -480 to -2730. Click OK button
![]()
6- Chooese ok button.
![]()
7- Horizontal spacing: You can adjust the horizontal spacing by changing the value of IconSpacing. The range of values is -480 to -2730. Click OK button

8- Chooese ok button.

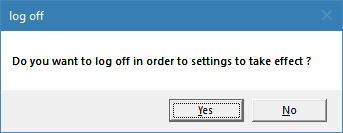
And Finish: Tap Yes button to see changes, icon spacing will be modified.

if you want to apply Back to normal icons double-click on the default.vbe

Click Yes button to see changes, The icon spacing is thus changed.

Your desktop icons should now be back to normal.
