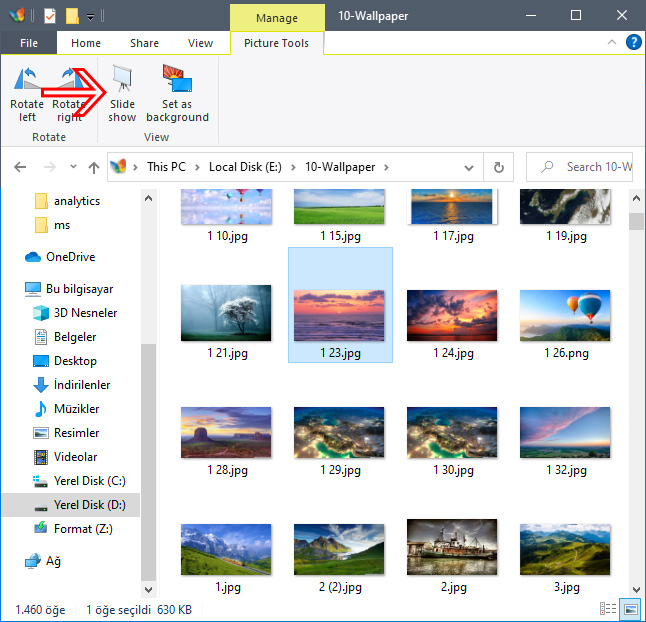
Windows 10 offers a simple slide show that displays one photo after another. It enhances the viewing pleasure of your favorites memories and creates fun moments with family and friends. When you select one or more images in a folder containing pictures (image files) in Windows 10, you can view them as a slide show. If you want to view your pictures in a clean slideshow on Windows 10, then this guide can be of much help.
How to View Pictures as a Slideshow in Windows 10
To easily start a slideshow of all images in a folder, open the folder that contains the images you want, and then select the first picture from the folder.
When in your Pictures folder, click the Manage tab and then click the Slide Show icon (shown here) from along the folder’s top.

As soon as you click the “Slide show” option all the selected images will appear one by one. To exit the slideshow, press the “ESC Key” on your keyboard.
You can also start a slideshow with only the specific images in a folder you want to use.
To select the images in the folder you want, hold down the Ctrl or Shift key on your keyboard to select the pictures you want to use. That will give you the same Picture Tools option in the Manage tab with the option to start a slideshow.

And, to view the slideshow advanced controls click right on the screen.

Click ‘Loop’ to run the pictures continuously
To adjust the image transition speed, click ‘Slow,’ ‘Medium,’ or ‘Fast.
To change the pictures manually, click ‘Pause’ and to go back to the automatic mode, click ‘Play.’
That’s all.
Recommended For You
Change Your User Account Picture in Windows 10
